Showing posts with label Projects. Show all posts

Tuesday, 3 May 2016

Screen Printing Tips and Tricks

screenprintingtipsandtricks

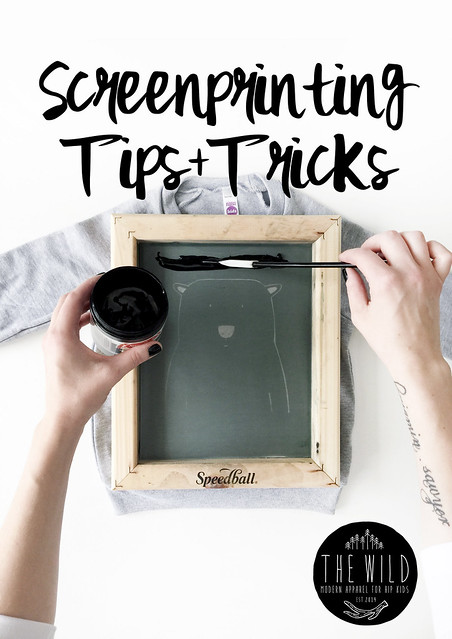
Hello there! Today I want to share some screen printing tips with you all. I did this on my Instagram account a few months back, so I'm going to copy most of that here but include some more info for you!

I am contacted regularly about silk screening, and I love sharing tips with people! There are a lot of small businesses out there trying to create brands and they are paying local printers to do this, which is totally ok if you have the budget to do so! But if you're starting with a shoestring budget like I did, then DIY is the way to go!

When I got started, I was really nervous about it. And I tried desperately to find info on various groups, message boards, etc. and I had a hard time getting some straight answers. SO. I'm going to cover some basics here, and please comment below if you have ANY questions!

First things first, you need to have your designs. For me, I draw everything by hand and then digitize it. You may do things in Photoshop, totally up to you! When your artwork is complete, have it printed onto transparencies (I use two and tape them together with clear tape). 

I will try to outline the steps here in my own words, I I recommend a book called Silk Screening Basics - A Complete How-to Handbook. This is how I learned and I really loved it. I refer to it still even now.

But, these are the basic steps, so let's get started!

Supplies:

  • Transparency of your artwork
  • Silk screens (I often order from Amazon)
  • Photo emulsion kit
  • Fabric ink (I love ordering from Desserres)
  • Squeegee (I use a smaller version of this one)
  • Lamp (or, you can use natural light but it's tricky)
  • A light tight box (I used one I had on hand and taped/covered all seams)
  • Piece of glass (I used one from a picture frame)
  • Black cloth or an old t shirt
  • Blank item you want to silk screen on
  • Spatulas (I buy mine from the dollar store)
  • Iron

Steps:

  1. The night before you want to print, you want to coat your new silk screen in the photo emulsion. Follow the kit steps to mix it, then coat the screen. Run a thin bead across the top of the screen and pull it down using your squeegee. Flip and repeat, flip and repeat, until you have it nicely covered with no empty spots.
  2. Place the screen in your light tight box, and let it dry overnight (or for a good few hours).
  3. When you're ready to burn your design, set up yur lamp according to the box directions, have it all set up but dn't plug it in yet.
  4. Go into a dark room, and take your screen out. The light can't hit the screen yet, so you have to sort of fumble through this part. Put your screen face down, then place your artwork on the back (backwards), and put the glass on top. Put it all back in the box.
  5. Bring everything to where you set your lamp up. Place your black cloth on the ground (this will prevent light reflecting and messing with your image), turn on your lamp, and quickly place your screen/design directly below it. Make sure at this point you set up your timer! (The time you burn your screen is included with the light kit)
  6. If you don't have a lamp and don't want one - you can do everything above and just take your screen outside. It's not foolproof, and you may have to redo your screen, but I did several in the natural light and found that about five minutes worked for me. You do NOT need a sunny day, overcast will work just fine.
  7. As soon as your time is done, quickly bring your screen to your shower and direct the water at the design. This part can take a bit of time, but soon your design will begin to reveal itself!
  8. Once your design is nice and crisp, dry it off with a papertowel, and place it outside for at least 20 minutes. This step really hardens the remaining emulsion, giving you a screen that will last years! I have been printing regaularly for nearly two years now and the only screens I've ever had to redo are the ones that I did in the natural light, back when I had no idea what I was doing. I REALLY recommend the lamp you guys, seriously, just get it.
  9. Now the easy part - printing!! Take your screen, and place it on top of your blank clothing item. I place something in between to pro the blank up towards the screen, you want nice tight contact. You can use a folded towel under the shirt, a padded ipad case even.
  10. Run a small bit of ink across the top of the design with your spatula, and holding your screen nice and firmly, use your squeegee to slide the ink down. Do this only once or twice, but firmly. 
  11. Lift the screen up, and you're done! - You may need to experiment here with pressure, amount of ink, etc. Use some scrap fabric or old items you no longer want beofre printing on your good blanks!
  12. Let your item dry completely, at least an hour or two.
  13. Run your iron over it for a couple of minutes (I put a thin cottom cloth between the ink and iron) to heat set the design and make it resistant to fading in the wash.
  14. THE END.
Here are some little extra tips I've learned along the way.

  • Watch a lot of Youtube. There are tons of video tutorials on there to help you with each step. 
  • Don't make your own screens. I mean, ok, fine, you can. But, I don't recommend that because if you use them a lot they take a bit of a beating, and they need to be PERFECTLY square in order to sit nice and flat. But that's just my opinion :) 
  • If you are printing and ink comes through where it shouldn't, I use a heavy threaded tape to patch the area. You can buy screen filler too, but this is just faster and no drying time. 
  • Use this tape to tape the edge of the screen, on the back side. Ink tends to squeeze through the edges if you press down hard enough and the emulsion breaks, so this tape protects you from ink bleeds even if that does happen, making your screen stronger.
  • If you want to redo your screen after a while, you can buy screen, just replace it! I find that easier than actually using the photo emulsion remover. 
  • Wash your screens quickly after each use. Take good care of them so they last a long time.
  • You can use any colour of ink on the same screen (for example, I print my grizzly bear in both black and white), just again make sure you thoroughly wash it in between and let it dry.
  • Only print with a bone dry screen, don't rush it, or your ink could bleed.
That about covers it! If I can ever help you, just email me thewildkidsapparelATgmail.com or comment below! 

Thanks so much for reading you guys!!! Happy printing!! 
a_sig2

Sunday, 9 December 2012

DIY Walrus Toy /// Step-by-step handmade soft toy tutorial

walrus93

Alright, this is my holiday DIY project finale..in the last week I've received a total of ELEVEN custom painting orders through my shop, so I have my work cut out for me! But, I still had to take a few minutes to share this. It was so much fun to make.

I decided ages ago that I wanted to make Ben a handmade toy for Christmas (you know, to balance out all of the fisher price crap) and I finally got around to it last week. This was MUCH easier than I thought it would be. It took some time, but it was very simple, and most of it I was able to do while drinking tea and watching bad daytime tv during Ben's naps. Yay!

Here's what you need:

  • One yard of fabric for the body
  • Half a yard of fabric for the tummy, snout and feet
  • Tiny little bit of white felt (I used leftover felt from my Christmas Tree Skirt DIY, but if you are buying it you can get away with asking for a few inches)
  • Black and white crochet thread
  • Stuffing (or a pillow you don't want anymore)
  • Fabric glue
  • Regular thread
  • Sewing machine
You might want to add more details like cute buttons or something, so you can add to this list as you need to. 

Here's how I did it. Very easy, and this time I took semi-decent (non-iPhone) pictures. Go me.

walrus1

I started by designing my walrus. This is based on my Walrus painting, because it seems to be Ben's favourite. I hereby allow anyone to copy this for personal use in making this soft toy, so go nuts! I used large craft paper and cut out a body shape, an oval for the tummy, etc. You can see above the shapes I used...and these do not need to be perfect, they look better if they're not! So use these shapes as a guideline, but feel free to change them up.

walrus2

I cut the fabric using the paper templates by tracing around them with a Sharpie.  I used a dark grey suiting fabric for the body and the lighter wooly grey fabric for the other parts. Make sure you cut two pieces for the body, and make them larger than you need (leaving room for a hem). The other pieces should be exactly the size you need.

walrus3

Next I placed my pieces on the fabric where I wanted them to go, and used a little bit of fabric glue to hold everything in place. Play around with the eyes and other pieces here to get the look you want. 

walrus4

Time to stitch! Using your black and white crochet thread, hand stitch around the tummy, snout, and feet. The eyes are also finished with stitches, and little details added here and there like little nostrils, foot details and whiskers . This part was really fun and quick, you can really just do as much or as little as you want. Here are a few close ups of the stitches that I did. 

walrus5

walrus6

walrus7

As you can see, my stitches are far from perfect. I like the look of it, but you can be more careful if you want here. You basically just sew it by hand, then knot the thread in the back when you're done. 

walrus8

Once you've stitched all of your details, you're almost done. Lay the two sides of the body together, with the good side of your walrus facing the second piece of fabric, and pin around the edges as shown above. (Here you can see the mess of hand stitching in the back....doesn't matter though). Stitch around the outside edge all the way around leaving a gap at the bottom for your filling (about 5 inches or so). 

Give it a quick iron, then flip it inside out. Stuff it with your filling (I used about half of the contents of a king size pillow) and blind stitch the opening. And you're done!

walrus91

walrus9

So, what do you think? Anyone going to give it a try? This project took me about 2 days to finish, and I only worked on it while Ben was napping or after he was in bed...so it's definitely doable before this Christmas!!! More holiday gift ideas here.

Just a reminder, my special A & B readers-only discount ends on December 10th! Use discount code AANDBSTORIES1 in my shop and you will get 20% off!
a_sig2

Saturday, 1 December 2012

DIY Modern black and white holiday advent calendar

advent_final

Happy December everyone! I have another holiday DIY for you, and just in time. This project is a modern, black and white holiday advent calendar that is really easy and cute! 

I've been planning this project since last year actually, but I finally got around to finishing it this year, yay! As I mentioned last Christmas, I was inspired by this advent calendar, because the cute pouches gave so much room for toys and goodies, so I just had to find a way to make it a little bit different.

What you will need:
  • White cotton fabric (a yard will do)
  • String of some kind (I used black and white baker's twine that I bought ages ago,you can order it through The Penny Paper Co.)
  • Sewing machine
  • Fabric marker (available at Walmart)
  • A large bell or ornament for bottom (totally optional)
  • Goodies for inside each pouch
Initially, I ordered pouches from an Etsy seller, and they are widely available online. In the end I decided I wanted a pure white bag which was very tough to find. I could have had them made, but I ended up just trying it myself and it was SO EASY. And if you read this blog regularly, you probably know that I loathe sewing. And I'm terrible at it. Like really bad.

So, the first thing I did was take my fabric and cut out 24 strips. Mine were about 12 cm x 30 cm. Before I get to the sewing (full instructions are below), I actually decorated the pouches first. I'm not sure why. I guess I figured I would rather not sew one of these and then ruin it. So I did it a little bit backwards. 

(Full disclosure, at first I thought I wanted to dip dye just the top edge of these white bags with black and then write a number on each one below that part...DISASTER. The ink bled right to the bottom instantly, so I cried a bit and then started over.)

Kids are so visual, so I thought having a little drawing on each one would be fun. I started a list of 24 Christmas-y or winter-y things....which was kind of hard! I really was hoping I could draw a good picture of Chevy Chase's face, but I'm not that talented. (Kidding! Sort of...) I decided to go with 6 designs...a different one for each would have been ideal, but some of these I could NOT draw. But, in case you're looking for ideas, here are a few:


Christmas tree, Noel, Candy Cane, Wreath, Snowflake, Snowman, Snow, Reindeer, Star, Ornament, Christmas lights, Present, Holly, Santa, Gingerbread man, Elf, Mitten, Fireplace, Ice skate, Sled, Stocking, Angel, Bell, Snow globe

I worked on some sketches before tackling the pouches. I didn't want to have to do a THIRD batch of these. I folded the strips of fabric in half, and using a fabric marker I drew designs on one side of each, and included a number on the back. I made sure to put some cardboard in the middle to prevent any bleed. Now, you don't need to take yourself too seriously here, these are essentially little doodles, but it's fun that way! Kids aren't going to care about how accurately you can draw a reindeer. And if your kids are old enough, they can do this themselves, even better! 

With all of the illustrations complete, now it was time to sew.

advent3

These pictures are atrocious, I apologize. Sewing stresses me out, and I didn't want to pause to get good light, I just wanted to get it finished. But basically, this was the process:
  • Take each strip, and sew a seam on each short end (folding the edges towards the 'bad' side of the fabric). 
  • Fold the pouch in half (so that your seams are facing each other, good sides together) and sew along the outer edges just to that seam. 
  • Use a safety pin to guide your string through both seams around the top (you want your string to be about 4 times the width of the pouch)
  • Flip the pouch inside out, give it a quick iron
advent9

To make the 'holder' for the advent pouches I took along piece of the same string and folded it in half, tying a loop at one end that was large enough to go around a door handle. Below the large loop I made 24 little knots, so that between each knot I could tie in one pouch. I wanted to be able to hang this vertically which is great for small spaces. I thought when Ben was a bit older he would love to have this hanging from his bedroom door handle or something. But if you wanted to hang this across a mantle you can just use a longer bit of string and make sure you have enough room between your knots to span the whole mantle. I finished this off by tying a large black bell to the bottom, which I bought years ago at a little shop in downtown Hamilton, but you could really use any sort of ornament, or nothing at all.

The last step was  just to fill my pouches with goodies and tie them on, that's it! About half of these have little toy cars and things like that, and the other half are activities like 'Watch a Christmas movie' or "Bring a toy to a donation centre". Obviously Ben is way too young to get that kind of thing, but I'm not! And why not start the tradition early :)

advent_finalclose

advent8

I hope you guys like this project! I will have one more holiday DIY in the next little while. It is a handmade stuffed toy that I'm making for Ben based on one of my nursery paintings. If I EVER finish it, that is.

Anyway, if anyone has any questions, please let me know! 


(I apologize for the ridiculous length of this post, as well as the plethora of spelling/grammar mistakes that are surely riddled throughout.)

P.S. Don't forget about my special A & B Stories-readers-only sale! 20% off with code AANDBSTORIES1 in my Etsy Shop
a_sig2

Tuesday, 27 November 2012

DIY Modern/minimal black and white Christmas tree skirt

DIYtreeskirt

Have you wandered down the tree skirt aisle at Walmart? The horror. I've gone through a few over the years, but I decided to make a really simple one this year, and I think I like it much better than those quilted covered-in-Santa versions. I thought I'd share it with you because it could not be more simple! Here's how I did it.

DIYtreeskirt1

You need:

One yard of white felt
Black embroidery thread
A thick, large, sharp needle
Hole puncher

DIYtreeskirt2

Taking the yard of felt, cut it into a circle. If you have something you can trace, awesome. I just held something in the centre and drew a circle with a pencil on a string like you learn to do in grade school. Whatever works. Trace a small circle in the centre too, and make one cut from the outer edge to the centre.

DIYtreeskirt3

Using your embroidery thread, make your stars starting from the underside of your tree skirt. Scatter them around here and there. Don't worry if they're not perfect. Mine are not all the same size and all look a bit different, and it looks cool that way.

DIYtreeskirt4

On the edge that you cut, use the hole punch to make two holes through the felt, and use leftover thread to tie it together.

DIYtreeskirt5

DIYtreeskirt6

That's it! I made this in under an hour while Ben napped, that's my kind of project. I have another holiday DIY coming next week so check back!

P.S. Don't forget about my special A & B Stories-readers-only sale! 20% off with code AANDBSTORIES1 in my Etsy Shop
a_sig2

Tuesday, 20 November 2012

Fall cleaning - purging and sorting out our chaos

fallcleaning

Spring cleaning is a huge thing, but I like to do that seasonally...partly because I'm a lunatic and partly because it makes the job easier if you spread it out a bit. So, with the holidays right around the corner, while everyone is hanging their Christmas lights, I'm going through every room in our house and PURGING. Now's as good a time as any.

Here's what I'm tossing:

  • Clothes that I haven't worn in months
  • Clothes Ben can't fit into
  • Old/unnecessary toys
  • Bed linens that we don't use anymore
  • Old coats
  • Old shoes
  • Household items we don't need

Ben already has too many toys, and toys he's grown out of. His little body is growing at lightening speed so half of his dresser is always occupied by too-small clothes. And I haven't done a clothes purge since I lost my baby belly (ok so it's not COMPLETELY gone, that's not the point!). If you hate getting rid of clothes, and you always find yourself holding on to things just in case, here's a really good tip: keep a big container somewhere in your house for clothes you THINK you want rid of. Do your purge and toss your old clothes in there ruthlessly. If you go 5 or 6 months without ever going into it, then pour the whole thing in a donation bag on your next purge (don't even look, you'll talk yourself into keeping it all again). 

Donating stuff like this is easier these days than ever. I called Clothesline, a Canadian donation program, and on November 30th they will be coming here to pick everything up. There is no limit, you simply label all of your bags or boxes with a big 'D' and leave them at the curb. It couldn't be more simple!

Purging is therapeutic for me, and I find I'm way happier when I know that at least some of the junk in our house is gone. Over the past few years I've realized the beauty of less...it started ages ago when I started reading Zen Habits. Are you familiar with this blog? I read it all the time and LOVE it. It's all about living a minimalist life, getting rid of clutter (in your home and life), and finding beauty in simplicity  I make a habit of reading every post. And no, my home isn't minimalist or clear of all clutter (I wish) but I like being aware of this sort of thing and making an effort to keep our home free of junk. It's taken a while, but I find that I'm wanting less stuff now more than ever. Oh I still want things, lots of things, but now I think more about my purchases. I talk myself out of buying things sometimes now, and that NEVER used to happen.

For example, last year Billy bought me an amazing Coach bag for Christmas. Now, I used to buy a new H&M bag every season (for real), but now I realize how wasteful that is. Wastes my money, and I grow sick of it so quickly (the donation bag full of purses proves it). It's so much better to have a smaller collection of really great clothes (I don't mean expensive, but I mean timeless, like a perfect-fitting cotton t-shirt), than it is to have 10 tops in colours that could only be worn in Spring 2011. 

In thinking about the holidays, I'm trying to be really careful with my gift-giving too. I want to go out of my way to get great gifts for my family and friends that will be timeless and thoughtful, and not something that will end up in next springs purge pile ;)

If you'd like to read a bit of Zen Habits, I'd really recommend these articles:
How about you, do you love to toss old stuff, or is it a dreaded activity? Any good purging tips to share?
a_sig2

Monday, 13 August 2012

Living room and dining room update

A little while ago we made a run to Ikea to grab a few things we needed to change up the living/dining rooms, and I LOVE how it turned out! Nothing major here, just a few new bits and pieces.

blackwhitelivingroom1

New textiles, new side table and coffee table (glass free, unlike the old one). And the little Ikea stool thingy that I've wanted forever.

blackwhitelivingroom2

The dining table has been put away to leave tons of room for Ben to play in. I also created a little work area for me, which is great for when I need to do a little bit of paperwork or add a quick layer to a painting. I also have more storage now for my paints/brushes/etc.

blackwhitelivingroom3

blackwhitelivingroom4

And you may notice that I got my Gran pillow the other day. LOVE. So happy I got it.

blackwhitelivingroom5

It's my goal in life to own everything from Fine Little Day. I feel like it's a pretty good life goal.

I still have more work to do in this room. I want to replace the current artwork with a HUGE set of three to span the entire southern wall, and I want to take down the curtains and replace them with nice tidy white wooden slat blinds. Oh, and we need a new tv unit too (without glass). I had wanted this one, but they changed it to this. Not a fan. Here's hoping the new Ikea catalogue comes soon and has something awesome. 

I hate having to break these projects up into bits and pieces, but I also know it's the patient grown up thing to do (greaaaaat).

Has anyone else been working on little updates in your homes? I need more inspiration!
a_sig2

Tuesday, 24 July 2012

Ben's Room - A few changes on the way

I've spent a lot of time in Ben's room over the last year and a bit. A lotttt. And like any other room in this house, it will surely go through many changes over the years. I've been planning some little updates and I'm hoping to get started pretty soon. 

I'm so, so inspired these days by people like Jennifer of A Merry Mishap and Deborah (who doesn't have a blog yet but I found her on Instagram a while ago thankfully). Their homes are PERFECTION. Like, in my dreams beautiful.

Jennifer's Home:

amm

Image via Jennifer's Instagram

Deborah's Home:

apieceofcake82

Image via Deborah's Instagram

I've been on a black and white kick in our home for a while now, but this just makes me want to do more. And more. 

Ben's room is going to go this route with pops of colour in toys and textiles. SO excited to get started. I've already gotten a little bit into it by working on some custom paintings for his room and moving things around a bit to make the room more functional. I've also ordered some fabrics to work on his bedding and some pillows. 

fabric

And then I just have to convince Billy that it's not crazy to paint this room white (read - paint the room while he's at work and see if he notices).

Can't wait to share the after pics!
a_sig2

Wednesday, 16 May 2012

A new cute chair for the front porch

I've been looking for a chair for our front porch for about a year now. I like to sit out front after Ben is asleep, it faces the sunset and our little street is so peaceful, I love it. I wasn't exactly sure what I wanted, but I knew I wanted it to be kind of small, since our front porch is tiny, and something with a cool shape. I ended up picking this amazing AMMERO dining chair from Ikea. Don't you love it?
ammero-chair-with-pad__0116366_PE270932_S4
It was only $75, which is pretty great for a nice outdoor chair (most that I've seen are well over $100). It's small but actually pretty roomy when you're sitting in it, and it's surprisingly comfortable. I think it's perfect!


frontporch1


Since we brought it home I have spent many evenings after dinner out there, wrapped up in a blanket, catching up on blogs, drinking tea, and watching horrible, horrible television shows (I actually can't stop watching Jennifer Love Hewitt's new Lifetime show. WHAT IS WRONG WITH ME.) And here's a pic of my view. Pretty great, right?


d6ed8e6091af11e18cf91231380fd29b_7


Oh, I love it. All this extra time outside has me thinking SO much about the garden and what plants I want to add this year. Tomorrow I have a cool (kind of lengthy, sorry in advance) post to share that's all about the best plants for people who are NOT good gardeners...hope you check back to see it!
a_sig2

Wednesday, 2 May 2012

Another living room update (because everything takes me 18 tries)

Now that I finally got that string pendant up...I can share our living room after pics, yay! First, a little back story...


When we walked in to our place for the first time...I thought that the living room was going to be such an easy fix. All it needed was paint, and I'd be done. And even though that's pretty much all we've done to this room, it's taken me three years to get it how I really, really want it.


LRchanges


The living room started off (NOT selected by us) a horrendous tan colour. Who picks colours like that? I guess the same people who buy plaid couches and hang floral quilts all over the walls (and never, ever, three years later, get their mail redirected). 

Anyway, I painted it light grey. I was in a real Sarah Richardson phase at the time (still am, I LOVE Sarah, but I've embraced a little more contrast in our home) and I wanted EVERY room grey at the time. And grey it was, until recently. I loved it. It was light and airy and a great neutral backdrop.


But...as time went on, it didn't feel right. I wanted some white. But not just white. And I wanted some black. But not ALL black. So, this is what I ended up with.


livingafter11


I painted the two long walls white, and the two short walls black (the same black that we have in our bedroom, kitchen, and bathroom). I love, love, love it. So much. It's just what I had in mind.


livingafter2


livingafter3


livingafter4


Don't mind our hideous dining room chairs that have been torn to shreds my our cheeky cats Finn and Arthur. One day I hope to have chairs that are hair/scratch/pet/kid proof. 


I do have more to do in this room...those white curtains are going to be replaced with white wooden blinds, or perhaps shutters. I actually like the curtains a lot, but they are not a good option when you have a dog that sheds ten pounds of hair a day, and makes a point of rubbing herself all over those curtains ALL DAY LONG. And I think I want to change out the tv area....but maybe not. I go back and forth.


I love mini-projects like this, they're fun and easy and so quick. And who knows, maybe I'll change this room ten more times. But designing your home is an ever evolving process...that's kind of the fun of it.
a_sig2
Related Posts Plugin for WordPress, Blogger...