Showing posts with label DIY. Show all posts

Tuesday, 3 May 2016

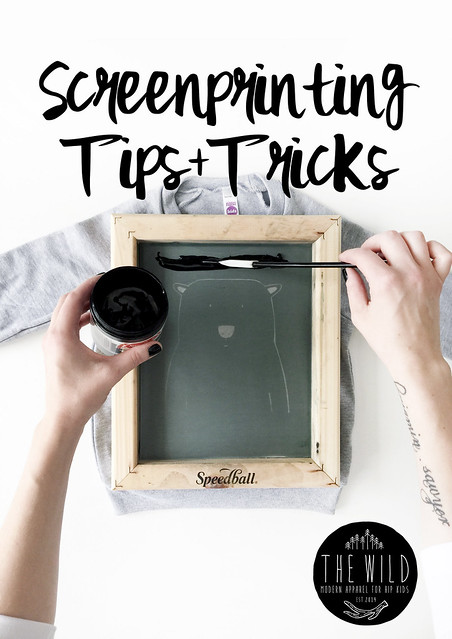
Screen Printing Tips and Tricks

screenprintingtipsandtricks

Hello there! Today I want to share some screen printing tips with you all. I did this on my Instagram account a few months back, so I'm going to copy most of that here but include some more info for you!

I am contacted regularly about silk screening, and I love sharing tips with people! There are a lot of small businesses out there trying to create brands and they are paying local printers to do this, which is totally ok if you have the budget to do so! But if you're starting with a shoestring budget like I did, then DIY is the way to go!

When I got started, I was really nervous about it. And I tried desperately to find info on various groups, message boards, etc. and I had a hard time getting some straight answers. SO. I'm going to cover some basics here, and please comment below if you have ANY questions!

First things first, you need to have your designs. For me, I draw everything by hand and then digitize it. You may do things in Photoshop, totally up to you! When your artwork is complete, have it printed onto transparencies (I use two and tape them together with clear tape). 

I will try to outline the steps here in my own words, I I recommend a book called Silk Screening Basics - A Complete How-to Handbook. This is how I learned and I really loved it. I refer to it still even now.

But, these are the basic steps, so let's get started!

Supplies:

  • Transparency of your artwork
  • Silk screens (I often order from Amazon)
  • Photo emulsion kit
  • Fabric ink (I love ordering from Desserres)
  • Squeegee (I use a smaller version of this one)
  • Lamp (or, you can use natural light but it's tricky)
  • A light tight box (I used one I had on hand and taped/covered all seams)
  • Piece of glass (I used one from a picture frame)
  • Black cloth or an old t shirt
  • Blank item you want to silk screen on
  • Spatulas (I buy mine from the dollar store)
  • Iron

Steps:

  1. The night before you want to print, you want to coat your new silk screen in the photo emulsion. Follow the kit steps to mix it, then coat the screen. Run a thin bead across the top of the screen and pull it down using your squeegee. Flip and repeat, flip and repeat, until you have it nicely covered with no empty spots.
  2. Place the screen in your light tight box, and let it dry overnight (or for a good few hours).
  3. When you're ready to burn your design, set up yur lamp according to the box directions, have it all set up but dn't plug it in yet.
  4. Go into a dark room, and take your screen out. The light can't hit the screen yet, so you have to sort of fumble through this part. Put your screen face down, then place your artwork on the back (backwards), and put the glass on top. Put it all back in the box.
  5. Bring everything to where you set your lamp up. Place your black cloth on the ground (this will prevent light reflecting and messing with your image), turn on your lamp, and quickly place your screen/design directly below it. Make sure at this point you set up your timer! (The time you burn your screen is included with the light kit)
  6. If you don't have a lamp and don't want one - you can do everything above and just take your screen outside. It's not foolproof, and you may have to redo your screen, but I did several in the natural light and found that about five minutes worked for me. You do NOT need a sunny day, overcast will work just fine.
  7. As soon as your time is done, quickly bring your screen to your shower and direct the water at the design. This part can take a bit of time, but soon your design will begin to reveal itself!
  8. Once your design is nice and crisp, dry it off with a papertowel, and place it outside for at least 20 minutes. This step really hardens the remaining emulsion, giving you a screen that will last years! I have been printing regaularly for nearly two years now and the only screens I've ever had to redo are the ones that I did in the natural light, back when I had no idea what I was doing. I REALLY recommend the lamp you guys, seriously, just get it.
  9. Now the easy part - printing!! Take your screen, and place it on top of your blank clothing item. I place something in between to pro the blank up towards the screen, you want nice tight contact. You can use a folded towel under the shirt, a padded ipad case even.
  10. Run a small bit of ink across the top of the design with your spatula, and holding your screen nice and firmly, use your squeegee to slide the ink down. Do this only once or twice, but firmly. 
  11. Lift the screen up, and you're done! - You may need to experiment here with pressure, amount of ink, etc. Use some scrap fabric or old items you no longer want beofre printing on your good blanks!
  12. Let your item dry completely, at least an hour or two.
  13. Run your iron over it for a couple of minutes (I put a thin cottom cloth between the ink and iron) to heat set the design and make it resistant to fading in the wash.
  14. THE END.
Here are some little extra tips I've learned along the way.

  • Watch a lot of Youtube. There are tons of video tutorials on there to help you with each step. 
  • Don't make your own screens. I mean, ok, fine, you can. But, I don't recommend that because if you use them a lot they take a bit of a beating, and they need to be PERFECTLY square in order to sit nice and flat. But that's just my opinion :) 
  • If you are printing and ink comes through where it shouldn't, I use a heavy threaded tape to patch the area. You can buy screen filler too, but this is just faster and no drying time. 
  • Use this tape to tape the edge of the screen, on the back side. Ink tends to squeeze through the edges if you press down hard enough and the emulsion breaks, so this tape protects you from ink bleeds even if that does happen, making your screen stronger.
  • If you want to redo your screen after a while, you can buy screen, just replace it! I find that easier than actually using the photo emulsion remover. 
  • Wash your screens quickly after each use. Take good care of them so they last a long time.
  • You can use any colour of ink on the same screen (for example, I print my grizzly bear in both black and white), just again make sure you thoroughly wash it in between and let it dry.
  • Only print with a bone dry screen, don't rush it, or your ink could bleed.
That about covers it! If I can ever help you, just email me thewildkidsapparelATgmail.com or comment below! 

Thanks so much for reading you guys!!! Happy printing!! 
a_sig2

Monday, 29 April 2013

Living Clean Pt. 5 - Cleaning & Around the house

Untitled

Here we are, the last post in the Living Clean Series. Are you ready?! 


Cleaning our home is a bit of an obsession for me. Sad, I know. But I'd be lying if I didn't admit that I'm crazy about cleanliness, and there is no better moment than the moment you've just finished cleaning the house top to bottom and it smells heavenly and you can make yourself a tea and watch Netflix. Or, more likely in this house, Bubble Guppies.

Until recently, I made a moderate attempt to be 'green' with cleaning. We do have a kid, after all. So I added Method to my cleaning arsenal, because I didn't really know any other brands. I didn't, however, remove my beloved Comet, or Windex, or Fantastic. Or my yummy smelling Pledge. 


Just like the whole makeup and body care stuff, I had no clue this stuff was all so bad. I was actively polluting the air in our home week after week. I won't reiterate all the reasons these cleaners are so bad for you, but this is a great article summing up the basics. 


Continuing on with my living clean mission, I got rid of all that stuff. All of it. And my research started. I've made a lot of changes, and cleaning my house is even more fun for me now (see how weird I am?) and I'm happy knowing that the air is no longer being filled with harmful chemicals. And, having my little one help out with chores is now totally ok!


Untitled


Here are some of the changes I've made:


Cleaners


I had a cleaner for everything. Like ten different products for each type of surface that I would lug around (and waste money on). After researching lot of brands, including the safer versions, I decided that I would be most comfortable making my own cleaner.  To be honest,I've never had an interest in homemade cleaners. I just prefer the smell of fake lemon to real lemon I guess? Well, my whole outlook is different now, so I went on a mission to find a good recipe for an all purpose cleaner.


After trying many, I've tweaked the ingredients to my liking, and I thought I would share the recipe here. This is now what I use on everything in our house from counters to mirrors to faucets.


homemadenaturalcleaner


Here's how you make it:


2 cups water

1/2 cup vinegar
10 or so drops of lemon essential oil

A lot of recipes call for more vinegar, but it's too strong for me. Although, you only smell the vinegar when you first spray, and just the lemon smell lingers once its dry. Still, I decreased the vinegar just a bit. I've been using this for weeks and its the BEST! I used an old method spray bottle for it (soaked it for a bit in water with some baking soda to freshen it up) and its working perfectly. Shake it up a bit before you spray to ensure your lemon essential oil is well distributed. 


To clean our floors, I have been using the Reveal Mop for ages now and I love it. I ended up recycling and replacing the cleaner bottle (no amount of soaking with baking soda or vinegar could clean the chemical cleaner smell) and made my own cleaner concoction. I fill the bottle about half way with water, then I add 1/8 cup vinegar, about 10 drops of lemon essential oil, and 1/2 a teaspoon of dish soap (more on that below), and fill the rest of the way with water. Give it a gentle shake and it's ready to go.


To clean sinks, toilets, and tubs, I use straight baking soda. That stuff is amazing. It gets rid of crayon from our coffee table, cleans label residue from surfaces (no more goo gone), and it is perfect on gross fridge handles. I've heard that it's great to clean your sink with half a lemon sprinkled with baking soda for a fresh scent, I'm going to try that soon!


I used to make my own Febreze using water, baking soda and fabric softener, but that doesn't fit with this whole natural movement, so I'm in the process of making an all natural version. I'll definitely share once I've figured it out!


Air Fresheners


Those Glade plugins are not your friend. They are loaded with chemicals that we're intentionally filling our air with 24/7! Pretty much all air 'fresheners' fall in this category...not natural at all and filled with toxins. Gross.


On cleaning days, I like to have the whole house smelling fresh and yummy, and my new homemade cleaners help, but they are subtle. Then I discovered simmer pots! So, I do this weekly now to make the whole house smell great!

First, as I'm cleaning I open the windows to bring some fresh air in. This is really key, especially during times when it's not warm out and the windows are shut all the time. On warmer days we can leave them open all day, but even on chilly days it's important to get a little burst of fresh air indoors. 


In addition to the lovely fresh air, this is a great trick to get your home smelling great. Once I'm done my cleaning I put the following in a small pot filled about halfway with water:

1 sliced lemon
1 tbsp vanilla extract
1 tbsp rosemary

Bring this to a boil, then reduce and simmer on low for as long as you like. Make sure you don't let the pot dry out! Top it up with water as needed. (If you do happen to let it dry, as I did once - oops! - soak it for a while then scrub with baking soda. This will only work if you don't have a non-stick pot). 


There are many variations of simmer pot recipes (like cinnamon sticks with sliced oranges and cloves, and many others). Take a look on pinterest and you'll find tons.

Cloths versus paper towels


I grabbed a pack of microfibre clothes to try. People rave about these, and I go through a lot of paper towels when I clean. This week I tried one, and I used just one to clean my entire house! It was like MAGIC. So now I can toss it I'm the laundry and save my paper towels for special occasions (ha ha). I'm also trying in general to be more mindful of my paper towel usage, as this is a major issue environmentally. For example, after Ben is done a meal, I always wash his fave with a wash cloth. Now, after I've washed his face, I rinse the cloth and wipe his high chair and the table with the same cloth, then toss it in the laundry. Why not, right?


Doing the dishes


Our dishwasher broke a while back and we haven't bothered getting it looked at, so I've been hand washing for a while. I always hand washed Ben's dishes anyway so it will always be part of the routine. I bought Dish It Out! Liquid dish soap and I LOVE IT!! Smells so fresh and points for a cute bottle. This is what I use in our floor cleaner (above) and it totally adds to the whole lemony smell. (I bought it on iHerb, which I've bought several things through now! They have a great selection). To note, many 'green' dish washing liquids aren't actually all that green. This one scores an A on EWG, so I'm happy with that!)


If you use a dishwasher, take a look on EWG at the options and see what is available. 

Lets talk about sponges. People are always worried about the bacteria that accumulates in a sponge after you've been using it for a while...but, did you know that almost all sponges come drenched in chemicals that are made to fend off that bacteria? Um, GROSS. It's actually very hard to find sponges free of this stuff. There are some safer versions like these ones, but I decided to opt out all together. I bought crocheted cotton scrubbies on Etsy and they work perfectly! And I can just toss them in the laundry each week. Easy peasy.


Laundry


Both laundry detergent and dryer sheets are pretty full of chemicals, and the safer ones are pricey! Not to mention hard to find. So I decided to a) stop using dryer sheets all together and b) make my own laundry soap. Ok, I'm officially granola. 


homemadenaturallaundrysoap


There are a billion homemade laundry soap recipes on Pinterest, so take a look. I didn't want to use Borax (personally I think that's better suited for cleaning toilets and such) so I experimented with a borax free version, and this one is great!


You need:


1 bar of soap (I used Kiss My Face Olive Oil and Honey)

2 cups of washing soda 
1/4 cup baking soda 

I used my food processor to grind the soap down to tiny little bits, added the washing soda and baking soda and kept blending until it was as fine as I could get it. Use 1 or 2 tablespoons of this per load. 


The next time I make a batch of this, I'm going to use Dr. Bronner's Lavender soap, as this seems to be a popular one to use for this. But, if it's not any different, I'll stick with the Kiss My Face because it's easier to find in stores and it's cheaper, yay!

I stored mine in this old mason jar that has been lying around here for ages, that now finally has a purpose. At first I tried just tossing this in the washing machine, over my laundry, and washing in cold water. Ya, that didn't work. I try to only wash in cold water, so I came up with a solution that takes me just a minute. I put a tbsp of this in a little container with super hot water and shake it up as I'm gathering my laundry, then I just pour it in like a liquid! 

Note: if you like your clothes to reek of meadows, this is not for you. There really isn't much scent left behind, but your clothes are clean and free of those nasty toxins, so get over your meadows. 

Not using dryer sheets has been totally fine, I actually don't see a difference. Some people swear by adding a 1/4 cup of vinegar to the rinse cycle, but I just didn't bother and it was fine. Yay! 

Hand Soap 

I grabbed some Mrs. Meyer's hand soaps, but I'm not convinced of their safety. They seem safe, but they list fragrance as an ingredient  which is an issue because any number of chemicals can be hidden behind that. According to their website they are free of phthalates, so I feel less worried...but I'm still looking for a better option. I do however adore the cute packaging. I'm a sucker. Your safest bet is really using all natural bar soaps, most of them score very well on EWG, they are cheap and they last forever. 

So that's the big list! There are many, many more changes I would like to make in our home and life, but I'm starting here, and I feel so excited about everything I've learned recently. I'm going to always try to be aware of this stuff, and make changes that I can in time. I may not be able to put solar panels on our house (one day?) but I can certainly switch to energy efficient bulbs and invest in a water filter pitcher instead of constantly buying bottled water. Baby steps! 

Please do share any other tips you have about making your life a little greener, I'd love more ideas!! And if you make even one tiny change as a result of this Living Clean Series, then I'm happy. That was the whole point :)
a_sig2

Tuesday, 26 March 2013

Simple DIY Exfoliating Foot Scrub Recipe - Brown Sugar, Baking Soda and Olive Oil

diyfootscrub

A while back I shared this DIY Exfoliating Baking Soda Face Mask Recipe, and I thought I would come up with a little follow up. I'm hoping to do a few more of these as well!

This foot scrub is SO easy to whip up before a bath or shower, and you probably have everything you need in your pantry already. Perfect!

Mix together 1 tablespoon each of brown sugar, baking soda and olive oil. Use the scrub on your feet, knees, elbows, or any other rough areas, and rinse off well. For even better results, use an acrylic foot file on your heels before you step in to the shower (on dry feet). This one is the BEST. After your feet are nice and dry, finish off with a really thick foot lotion (I love this one) and that's it!
a_sig2

Sunday, 9 December 2012

DIY Walrus Toy /// Step-by-step handmade soft toy tutorial

walrus93

Alright, this is my holiday DIY project finale..in the last week I've received a total of ELEVEN custom painting orders through my shop, so I have my work cut out for me! But, I still had to take a few minutes to share this. It was so much fun to make.

I decided ages ago that I wanted to make Ben a handmade toy for Christmas (you know, to balance out all of the fisher price crap) and I finally got around to it last week. This was MUCH easier than I thought it would be. It took some time, but it was very simple, and most of it I was able to do while drinking tea and watching bad daytime tv during Ben's naps. Yay!

Here's what you need:

  • One yard of fabric for the body
  • Half a yard of fabric for the tummy, snout and feet
  • Tiny little bit of white felt (I used leftover felt from my Christmas Tree Skirt DIY, but if you are buying it you can get away with asking for a few inches)
  • Black and white crochet thread
  • Stuffing (or a pillow you don't want anymore)
  • Fabric glue
  • Regular thread
  • Sewing machine
You might want to add more details like cute buttons or something, so you can add to this list as you need to. 

Here's how I did it. Very easy, and this time I took semi-decent (non-iPhone) pictures. Go me.

walrus1

I started by designing my walrus. This is based on my Walrus painting, because it seems to be Ben's favourite. I hereby allow anyone to copy this for personal use in making this soft toy, so go nuts! I used large craft paper and cut out a body shape, an oval for the tummy, etc. You can see above the shapes I used...and these do not need to be perfect, they look better if they're not! So use these shapes as a guideline, but feel free to change them up.

walrus2

I cut the fabric using the paper templates by tracing around them with a Sharpie.  I used a dark grey suiting fabric for the body and the lighter wooly grey fabric for the other parts. Make sure you cut two pieces for the body, and make them larger than you need (leaving room for a hem). The other pieces should be exactly the size you need.

walrus3

Next I placed my pieces on the fabric where I wanted them to go, and used a little bit of fabric glue to hold everything in place. Play around with the eyes and other pieces here to get the look you want. 

walrus4

Time to stitch! Using your black and white crochet thread, hand stitch around the tummy, snout, and feet. The eyes are also finished with stitches, and little details added here and there like little nostrils, foot details and whiskers . This part was really fun and quick, you can really just do as much or as little as you want. Here are a few close ups of the stitches that I did. 

walrus5

walrus6

walrus7

As you can see, my stitches are far from perfect. I like the look of it, but you can be more careful if you want here. You basically just sew it by hand, then knot the thread in the back when you're done. 

walrus8

Once you've stitched all of your details, you're almost done. Lay the two sides of the body together, with the good side of your walrus facing the second piece of fabric, and pin around the edges as shown above. (Here you can see the mess of hand stitching in the back....doesn't matter though). Stitch around the outside edge all the way around leaving a gap at the bottom for your filling (about 5 inches or so). 

Give it a quick iron, then flip it inside out. Stuff it with your filling (I used about half of the contents of a king size pillow) and blind stitch the opening. And you're done!

walrus91

walrus9

So, what do you think? Anyone going to give it a try? This project took me about 2 days to finish, and I only worked on it while Ben was napping or after he was in bed...so it's definitely doable before this Christmas!!! More holiday gift ideas here.

Just a reminder, my special A & B readers-only discount ends on December 10th! Use discount code AANDBSTORIES1 in my shop and you will get 20% off!
a_sig2

Saturday, 1 December 2012

DIY Modern black and white holiday advent calendar

advent_final

Happy December everyone! I have another holiday DIY for you, and just in time. This project is a modern, black and white holiday advent calendar that is really easy and cute! 

I've been planning this project since last year actually, but I finally got around to finishing it this year, yay! As I mentioned last Christmas, I was inspired by this advent calendar, because the cute pouches gave so much room for toys and goodies, so I just had to find a way to make it a little bit different.

What you will need:
  • White cotton fabric (a yard will do)
  • String of some kind (I used black and white baker's twine that I bought ages ago,you can order it through The Penny Paper Co.)
  • Sewing machine
  • Fabric marker (available at Walmart)
  • A large bell or ornament for bottom (totally optional)
  • Goodies for inside each pouch
Initially, I ordered pouches from an Etsy seller, and they are widely available online. In the end I decided I wanted a pure white bag which was very tough to find. I could have had them made, but I ended up just trying it myself and it was SO EASY. And if you read this blog regularly, you probably know that I loathe sewing. And I'm terrible at it. Like really bad.

So, the first thing I did was take my fabric and cut out 24 strips. Mine were about 12 cm x 30 cm. Before I get to the sewing (full instructions are below), I actually decorated the pouches first. I'm not sure why. I guess I figured I would rather not sew one of these and then ruin it. So I did it a little bit backwards. 

(Full disclosure, at first I thought I wanted to dip dye just the top edge of these white bags with black and then write a number on each one below that part...DISASTER. The ink bled right to the bottom instantly, so I cried a bit and then started over.)

Kids are so visual, so I thought having a little drawing on each one would be fun. I started a list of 24 Christmas-y or winter-y things....which was kind of hard! I really was hoping I could draw a good picture of Chevy Chase's face, but I'm not that talented. (Kidding! Sort of...) I decided to go with 6 designs...a different one for each would have been ideal, but some of these I could NOT draw. But, in case you're looking for ideas, here are a few:


Christmas tree, Noel, Candy Cane, Wreath, Snowflake, Snowman, Snow, Reindeer, Star, Ornament, Christmas lights, Present, Holly, Santa, Gingerbread man, Elf, Mitten, Fireplace, Ice skate, Sled, Stocking, Angel, Bell, Snow globe

I worked on some sketches before tackling the pouches. I didn't want to have to do a THIRD batch of these. I folded the strips of fabric in half, and using a fabric marker I drew designs on one side of each, and included a number on the back. I made sure to put some cardboard in the middle to prevent any bleed. Now, you don't need to take yourself too seriously here, these are essentially little doodles, but it's fun that way! Kids aren't going to care about how accurately you can draw a reindeer. And if your kids are old enough, they can do this themselves, even better! 

With all of the illustrations complete, now it was time to sew.

advent3

These pictures are atrocious, I apologize. Sewing stresses me out, and I didn't want to pause to get good light, I just wanted to get it finished. But basically, this was the process:
  • Take each strip, and sew a seam on each short end (folding the edges towards the 'bad' side of the fabric). 
  • Fold the pouch in half (so that your seams are facing each other, good sides together) and sew along the outer edges just to that seam. 
  • Use a safety pin to guide your string through both seams around the top (you want your string to be about 4 times the width of the pouch)
  • Flip the pouch inside out, give it a quick iron
advent9

To make the 'holder' for the advent pouches I took along piece of the same string and folded it in half, tying a loop at one end that was large enough to go around a door handle. Below the large loop I made 24 little knots, so that between each knot I could tie in one pouch. I wanted to be able to hang this vertically which is great for small spaces. I thought when Ben was a bit older he would love to have this hanging from his bedroom door handle or something. But if you wanted to hang this across a mantle you can just use a longer bit of string and make sure you have enough room between your knots to span the whole mantle. I finished this off by tying a large black bell to the bottom, which I bought years ago at a little shop in downtown Hamilton, but you could really use any sort of ornament, or nothing at all.

The last step was  just to fill my pouches with goodies and tie them on, that's it! About half of these have little toy cars and things like that, and the other half are activities like 'Watch a Christmas movie' or "Bring a toy to a donation centre". Obviously Ben is way too young to get that kind of thing, but I'm not! And why not start the tradition early :)

advent_finalclose

advent8

I hope you guys like this project! I will have one more holiday DIY in the next little while. It is a handmade stuffed toy that I'm making for Ben based on one of my nursery paintings. If I EVER finish it, that is.

Anyway, if anyone has any questions, please let me know! 


(I apologize for the ridiculous length of this post, as well as the plethora of spelling/grammar mistakes that are surely riddled throughout.)

P.S. Don't forget about my special A & B Stories-readers-only sale! 20% off with code AANDBSTORIES1 in my Etsy Shop
a_sig2

Tuesday, 27 November 2012

DIY Modern/minimal black and white Christmas tree skirt

DIYtreeskirt

Have you wandered down the tree skirt aisle at Walmart? The horror. I've gone through a few over the years, but I decided to make a really simple one this year, and I think I like it much better than those quilted covered-in-Santa versions. I thought I'd share it with you because it could not be more simple! Here's how I did it.

DIYtreeskirt1

You need:

One yard of white felt
Black embroidery thread
A thick, large, sharp needle
Hole puncher

DIYtreeskirt2

Taking the yard of felt, cut it into a circle. If you have something you can trace, awesome. I just held something in the centre and drew a circle with a pencil on a string like you learn to do in grade school. Whatever works. Trace a small circle in the centre too, and make one cut from the outer edge to the centre.

DIYtreeskirt3

Using your embroidery thread, make your stars starting from the underside of your tree skirt. Scatter them around here and there. Don't worry if they're not perfect. Mine are not all the same size and all look a bit different, and it looks cool that way.

DIYtreeskirt4

On the edge that you cut, use the hole punch to make two holes through the felt, and use leftover thread to tie it together.

DIYtreeskirt5

DIYtreeskirt6

That's it! I made this in under an hour while Ben napped, that's my kind of project. I have another holiday DIY coming next week so check back!

P.S. Don't forget about my special A & B Stories-readers-only sale! 20% off with code AANDBSTORIES1 in my Etsy Shop
a_sig2

Wednesday, 21 November 2012

Update - DIY Baking Soda Face Mask


bakingsodamask

I've had some emails in the past while about this mask, including some great feedback and questions, so I thought I would post a little update with a few more notes.

Just as a reminder, here is the mask recipe and how to from the original post:
  • 2 tablespoons of baking soda
  • 2 teaspoons of water
That's it. Mix it together in a little bowl until a nice thick paste forms. This will give you enough to cover your face, neck, chest and the top of your hands.

Starting with clean skin, cover each area slowly using a GENTLE circular motion (it may not seem like it, but this is exfoliating your skin majorly, so go easy, you'll feel it after). I LOVED the texture of this, it felt like velvet. 

Leave it on for 5 to 10 minutes, and gently rinse away. After your skin will feel a bit tingle, and it will be in need of some moisture. Slather on your face lotion (I like Aveda's Botanical Kinetics™ Hydrating Lotion) and that's it!

Now for my update! I have been using this mask about once a month, and I am loving the results. Here are some notes on how I've been using it:
  • With occasional use, I feel like my pores look better. You can't ever shrink them, but you can keep them clean, and this does that for me.
  • I feel like I can go a little lighter with my daily routine now. I wash my face morning and night (I use Dove Sensitive skin bar soap with the Olay Cleansing Brush, and I LOVE them both). I also use day and night cream, but I don't really worry about anything else. 
  • I do NOT have perfect skin, but I do feel like using this routine makes my skin look  as good as it can. In the past I have tried every face product you can buy, and I don't bother with new ones anymore.
  • If I didn't stress it enough in the initial post, you really need to be gentle. This feels deceivingly smooth, but in actuality it's really taking off that dead skin. If you scrub too hard, you will feel very sensitive afterwards.
  • I actually have sensitive skin, and this works for me, but I'm careful to be gentle and I always follow up with a healthy dose of moisturiser. 
  • This is best used every few weeks, not every day! This is a special treatment, and you have to find what works best for your skin. Some people may be able to do this weekly, and some may not be able to use it at all. Be careful and don't overdue it!
  • Using it on your hands is really amazing. I mentioned that initially but I can't stress it enough. Us ladies are tough on our hands with the dishes and cleaning, so give this a try. In fact, you can probably use this more frequently on just your hands. Here's the best way - make this mask and work it over your hands for a good couple of minutes. Follow up with a really heavy hand cream (I like this one) and them slip on some moisture gloves. I like to do this right before bed and it's amazing!
Ok, I hope that answers all of the questions I've received! I'm planning another DIY beauty treatment that's pretty awesome too, hoping to have it up soon!
a_sig2

Saturday, 29 September 2012

A&B List

ABlist

I decided to rename A&B Love to A&B List because A) it's less cheesy B) I get bored easily and need constant change and C) who cares really. So ya. 

In other news, it's been a super busy few weeks for me, I've had 14 commission requests over the last two weeks. Um, what? Seriously? Loving it. So awesome.

But, I've also had a few minutes here and there to spot some cool stuff on the web/pinterest/blog/etc. and so we have a new list!

bagbyrina
Image via Rarerina
a_sig2

Wednesday, 22 August 2012

DIY Ombré Bedding via House and Home

HHDIY

House and Home Mag featured this Ombré Bedding DIY and I fell in LOVE. I have to give this a try! So pretty!

Image via House and Home Magazine
a_sig2

Thursday, 24 May 2012

Simple DIY Exfoliating Baking Soda Face Mask Recipe

bakingsodamask

I'm trying to take better care of my skin these days, as I mentioned in this post. I actually think I'm too late, sleepless nights have aged me a good decade, but better late than never.

One thing that I NEVER use are face masks. I never thought they really did anything, I never had time, yadda yadda yadda. 

Not too long ago I started looking into them, and found a million recipes online. I like the idea of there being just a few ingredients, and better yet, ingredients I already have. I also didn't like the idea of using honey or egg or anything gross and sticky. Ew.

So, I experimented a little, and came up with the most simple recipe ever, and the results were AMAZING. Here's all you need.

Exfoliating Baking Soda Face Mask Recipe:
  • 2 tablespoons of baking soda
  • 2 teaspoons of water
That's it. Mix it together in a little bowl until a nice thick paste forms. This will give you enough to cover your face, neck, chest and the top of your hands.

Starting with clean skin, cover each area slowly using a GENTLE circular motion (it may not seem like it, but this is exfoliating your skin majorly, so go easy, you'll feel it after). I LOVED the texture of this, it felt like velvet. 

Leave it on for 5 to 10 minutes, and gently rinse away. After your skin will feel a bit tingle, and it will be in need of some moisture. Slather on your face lotion (I like Aveda's Botanical Kinetics™ Hydrating Lotion) and that's it!

If you have extra time, try mixing up a bigger batch (just triple the recipe) and use it all over. It's like a spa in a box of Arm and Hammer. Bam.
a_sig2

Monday, 30 April 2012

(Yet another) DIY Moooi Random String Pendant Tutorial

stringpendantdiy1


For a while now, this project made me want to cry. I had been wanting to try this for SO LONG. I mean, I would LOVE to have the real thing. But my lottery winnings haven't come in just yet. So as usual I wanted to give it a try. In the end, it took three attempts to get this right. There is a slight chance that the string has fallen into a pile on the dining room table right now...but I think it's pretty solid. The last try, however, was the easiest, and best, which is what I'm sharing.


FYI, I don't have a bulb in mine. I will one day, but our dining room ceiling doesn't have an electrical box, and I'm totally ok with the weirdness of just hanging it empty. I will give a link that part of the project though.


There are a LOT of string pendant DIYs out there. This is about the 900th. Some of them are kind of bad. I saw one where the finished pendant looked like a big saggy teardrop....um...that's not the look we're going for kids. But, this worked for me. So, here we go.
moooistringpendantDIY
Supplies:
  • String
  • Stiffy Fabric Stiffener
  • A large balloon (I ordered mine from ShopHaha) - you might want to order a couple just in case
  • A thick tarp (don't use a thin plastic drop cloth, it will stick to everything)
  • Foam brush
  • Electrical cord set
  • Optional - gloves (I didn't end up using them because they were just a pain, and this stuff washed off really easily)
Before I go into how I did this, a few notes about the other DIYs out there...and what I learned.
  • A lot of tutorials say to hang the balloon and wrap it. This will take you approximately 17 years, plus you will need two people, and there will be a LOT of swearing. Instead, at first, I decided to tie the balloon the metal part of an old lampshade, and thought I would stand it up and work on it that way. That was my first fail. In the end, I simply placed the balloon on the tarp, on the floor, and pulled the string over it, turning the balloon as I went. It was fast and easy. 
  • Don't use Hodge Podge or whatever it's called. Again, I tried it, and it wasn't good enough. 
  • Don't use an exercise ball. I had a hard enough time getting the balloon out, I don't know HOW you would deal with one of those things. (EDIT: So a reader let me know that an exercise ball worked for her...just make sure you cut a large hole for the lightbulb (about 5 inches - thanks Dani!)
  • Don't wear anything you remotely like when you're doing this. 
  • Don't do this while baby is napping unless someone else is there to pick him or her up. You will be sticky.
How to make your string pendant:
  • Blow up your balloon to the size you want. Tie a string around the knotted part of the balloon so that you can hang it up somewhere when you're done.
  • Put the string in a bowl and pour the Stiffy Fabric Stiffener over it, saturating it completely (you can use any bowl, it will wash away easily after). Don't unravel your string, just leave the whole thing on the roll, it will be easier when you're wrapping it around your balloon.
  • Place your balloon on the floor in the middle of your blue tarp, with the bowl beside you. Unravel a bit of the string, and tie the string all the way around the balloon once, knotting it. This will sort of help you get started. You won't notice the knot after...it all blends in. 
  • Now, start wrapping. You can keep the balloon down on the tarp, just wrap it sort of as if you were pulling ribbon over a present, and turn the balloon as you go. You'll get a real feel for it, and I found that it went really quickly. Try to keep the pattern random. Do this until the whole ball of string is gone. I used one roll and it was plenty. It all depends on how dense you want the string to be. 
  • For the light opening, you have two options. 1) keep one area free of string, leaving an opening to change the bulb down the road, or 2) wrap the whole thing solid and cut a hole later. I've seen it done both ways. I like the idea of leaving a hole, it will just look cooler I think.
  • If, as you wrap, you run into a knot or something weird happens, just cut the string, tuck it into the other string on the balloon, and start again making your knot the way you did in the beginning. I did this three times and it was no big deal.
  • When you're done, hang it somewhere to dry, I left mine for two days.
  • Once it's dry...go over it with a foam brush and more fabric stiffener. DON'T paint it on all over though. Use the foam brush like a bingo dabber (lol) just on the string. If you try to paint, you'll tug the string and it will be tough. I just dabbed all over, and it worked fine.
  • Another two days later, you're ready to get that balloon out of there. Do this outside. I learned this the hard way. 
  • Take the eraser end of a pencil and slowly push on the balloon through the openings. Take your time, and make sure it's loose everywhere. 
  • Holding the balloon a bit away from the knotted part, use scissors and very gently cut a tiny hole into that part of the balloon (I didn't want it to pop...I wanted it to slowly deflate). Allow the balloon to deflate, using the eraser end of the pencil again if you need to quickly release bits of the balloon. The fabric stiffener dries and COVERS the balloon in billons of little flakes, which is what created the mess at this stage. Once the balloon is completely deflated, pull it through the largest opening you can find in the balloon (or the hole, if you left one). The flakey bits will all fall out of you shake the thing. 
  • If there are bits of fabric stiffener here and there stuck in the little holes, use a paint brush to dust them away gently.
  • Now at this stage, I simply looked for the most dense patch of the pendant, and hung it with the same string that I used to make it. If you want the light portion...
  • You can buy white cord sets like this one that you could simply pull through and be done with it. Or, if you want it to look a little more professional, I recommend taking a look at Jen Ramos' pendant DIY post. Hers looks fab.
After all of these steps, this is what I ended up with. I LOVE it. Love. It's my new favourite thing. (Yes, I know, I didn't tie the top string very well. I'm inpatient. It's fixed now.)

stringpendantdiy3

stringpendantdiy2

Ok, have I missed anything? Have questions? Let me know! 
a_sig2

Saturday, 10 December 2011

New Christmas Stockings

I really had my heart set on the new Ikea Christmas stockings this year. I loved the white ones with the snowflakes...so cute. However, my local Ikea apparently wasn't carrying any stockings this year. Bah humbug. 


So, I just made some with some old curtain fabric I had in the linen closet, and I LOVE them!


newstockings1


I'm not into sewing at all, I only do it when I absolutely have to, but I used this video series and it was seriously easy. And, it doesn't look like a cheapo homemade stocking. I was pretty worried about unfinished edges being on the inside and the whole thing feeling thin and flimsy...but thanks to the lining in this video the whole thing looks perfect. And perfection makes me happy.


Happy sewing!


a_sig2
facebook facebook twitter pinterest instagram tumblr flickr


Vote For Us @ TopBabyBlogs.Com - A Top Baby Blog List By topbabyblogs.com


bloglovin
Related Posts Plugin for WordPress, Blogger...