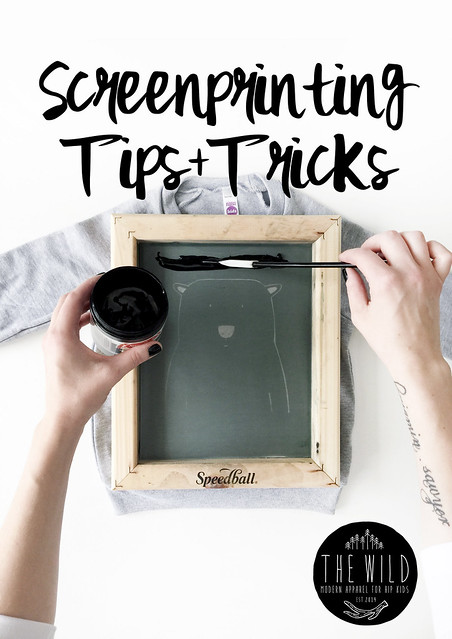
Hello there! Today I want to share some screen printing tips with you all. I did this on my Instagram account a few months back, so I'm going to copy most of that here but include some more info for you!
I am contacted regularly about silk screening, and I love sharing tips with people! There are a lot of small businesses out there trying to create brands and they are paying local printers to do this, which is totally ok if you have the budget to do so! But if you're starting with a shoestring budget like I did, then DIY is the way to go!
When I got started, I was really nervous about it. And I tried desperately to find info on various groups, message boards, etc. and I had a hard time getting some straight answers. SO. I'm going to cover some basics here, and please comment below if you have ANY questions!
First things first, you need to have your designs. For me, I draw everything by hand and then digitize it. You may do things in Photoshop, totally up to you! When your artwork is complete, have it printed onto transparencies (I use two and tape them together with clear tape).
I will try to outline the steps here in my own words, I I recommend a book called Silk Screening Basics - A Complete How-to Handbook. This is how I learned and I really loved it. I refer to it still even now.
But, these are the basic steps, so let's get started!
Supplies:
- Transparency of your artwork
- Silk screens (I often order from Amazon)
- Photo emulsion kit
- Fabric ink (I love ordering from Desserres)
- Squeegee (I use a smaller version of this one)
- Lamp (or, you can use natural light but it's tricky)
- A light tight box (I used one I had on hand and taped/covered all seams)
- Piece of glass (I used one from a picture frame)
- Black cloth or an old t shirt
- Blank item you want to silk screen on
- Spatulas (I buy mine from the dollar store)
- Iron
Steps:
- The night before you want to print, you want to coat your new silk screen in the photo emulsion. Follow the kit steps to mix it, then coat the screen. Run a thin bead across the top of the screen and pull it down using your squeegee. Flip and repeat, flip and repeat, until you have it nicely covered with no empty spots.
- Place the screen in your light tight box, and let it dry overnight (or for a good few hours).
- When you're ready to burn your design, set up yur lamp according to the box directions, have it all set up but dn't plug it in yet.
- Go into a dark room, and take your screen out. The light can't hit the screen yet, so you have to sort of fumble through this part. Put your screen face down, then place your artwork on the back (backwards), and put the glass on top. Put it all back in the box.
- Bring everything to where you set your lamp up. Place your black cloth on the ground (this will prevent light reflecting and messing with your image), turn on your lamp, and quickly place your screen/design directly below it. Make sure at this point you set up your timer! (The time you burn your screen is included with the light kit)
- If you don't have a lamp and don't want one - you can do everything above and just take your screen outside. It's not foolproof, and you may have to redo your screen, but I did several in the natural light and found that about five minutes worked for me. You do NOT need a sunny day, overcast will work just fine.
- As soon as your time is done, quickly bring your screen to your shower and direct the water at the design. This part can take a bit of time, but soon your design will begin to reveal itself!
- Once your design is nice and crisp, dry it off with a papertowel, and place it outside for at least 20 minutes. This step really hardens the remaining emulsion, giving you a screen that will last years! I have been printing regaularly for nearly two years now and the only screens I've ever had to redo are the ones that I did in the natural light, back when I had no idea what I was doing. I REALLY recommend the lamp you guys, seriously, just get it.
- Now the easy part - printing!! Take your screen, and place it on top of your blank clothing item. I place something in between to pro the blank up towards the screen, you want nice tight contact. You can use a folded towel under the shirt, a padded ipad case even.
- Run a small bit of ink across the top of the design with your spatula, and holding your screen nice and firmly, use your squeegee to slide the ink down. Do this only once or twice, but firmly.
- Lift the screen up, and you're done! - You may need to experiment here with pressure, amount of ink, etc. Use some scrap fabric or old items you no longer want beofre printing on your good blanks!
- Let your item dry completely, at least an hour or two.
- Run your iron over it for a couple of minutes (I put a thin cottom cloth between the ink and iron) to heat set the design and make it resistant to fading in the wash.
- THE END.
Here are some little extra tips I've learned along the way.
- Watch a lot of Youtube. There are tons of video tutorials on there to help you with each step.
- Don't make your own screens. I mean, ok, fine, you can. But, I don't recommend that because if you use them a lot they take a bit of a beating, and they need to be PERFECTLY square in order to sit nice and flat. But that's just my opinion :)
- If you are printing and ink comes through where it shouldn't, I use a heavy threaded tape to patch the area. You can buy screen filler too, but this is just faster and no drying time.
- Use this tape to tape the edge of the screen, on the back side. Ink tends to squeeze through the edges if you press down hard enough and the emulsion breaks, so this tape protects you from ink bleeds even if that does happen, making your screen stronger.
- If you want to redo your screen after a while, you can buy screen, just replace it! I find that easier than actually using the photo emulsion remover.
- Wash your screens quickly after each use. Take good care of them so they last a long time.
- You can use any colour of ink on the same screen (for example, I print my grizzly bear in both black and white), just again make sure you thoroughly wash it in between and let it dry.
- Only print with a bone dry screen, don't rush it, or your ink could bleed.
That about covers it! If I can ever help you, just email me thewildkidsapparelATgmail.com or comment below!
Thanks so much for reading you guys!!! Happy printing!!


